


Long exposure is a fascinating technique in photography that delivers impressive results, especially in night shots. Whether you’re an experienced photographer or a curious beginner, the possibilities available to you are almost endless. From exploring urban landscapes to playing with natural elements, the night offers a unique canvas to bring your creative ideas to life. However, to make the most of your nocturnal outings, a few tips and tricks are essential. Let’s dive into the world of long exposure and discover how you can create breathtaking night shots.
Key Insights
- Long exposure allows you to capture the dynamics of the night through light and shadow.
- A stable tripod is essential to avoid blurring during long exposure times.
- Experiment with different exposure times to achieve unique effects.
- Use multiple exposures to create creative and distinctive images.
- Post-processing can be crucial to getting the most out of your night photos.
Discovering the Magic of Long Exposure
Why Long Exposure is So Fascinating
Long exposure is more than just a technique – it’s like a window to another world. The way it captures movement and time is simply magical. Imagine seeing the gentle flow of a waterfall or the majestic movement of stars in the night sky. All this is possible because the camera captures light over a longer period. This method is particularly exciting because it makes things visible that the human eye does not perceive in this way.
The Role of Exposure Time in Night Photography
In night photography, exposure time plays a crucial role. In low light, it is important to choose the exposure time so that enough light falls on the sensor to obtain clear and detailed images. Here you can experiment with different times to achieve different effects. Light trails from cars or the movement of clouds can be impressively captured in this way. A good understanding of exposure time helps you find the balance between light and darkness.
How Long Exposure Boosts Your Creativity
Long exposure is a playground for creative minds. It offers you the opportunity to experiment with different elements and create unique images. For example, you can work with light painting, where you draw patterns or shapes in the air with a light source while the camera is exposed. Or you can try multiple exposures to create surreal effects. The possibilities are almost limitless and allow your imagination to run wild.
“Long exposure opens up the possibility for you to see and shape the world in a completely new way.”
Use this technique to expand your photographic skills and create images that not only impress but also tell stories.
Equipment and Settings for Perfect Night Shots
The Importance of a Stable Tripod
A stable tripod is the backbone of your night photography. Without it, it will be difficult to keep the camera steady, especially during long exposure times. Blurred images are the enemy of any long exposure. Make sure your tripod is sturdy and heavy enough not to tip over in the wind. A small tip: Hang a backpack on the center column for extra stability.
Camera Settings for Optimal Results
The right camera settings are the key to successful night shots. Here are a few basic tips:
- ISO: Keep the ISO value as low as possible to avoid image noise. A value between 100 and 800 is often ideal.
- Aperture: A wide-open aperture (e.g., f/2.8) lets in more light and is perfect for dark scenes.
- Exposure time: Experiment with different exposure times to capture the right amount of light. Longer times capture more light, but watch out for motion blur.
Useful Gadgets for Night Photography
In addition to the camera and tripod, there are a few other useful helpers:
- Remote shutter release: Avoid vibrations when triggering the camera.
- LED lights: Accentuate your scene or highlight specific areas.
- Flashlight: Not only for seeing but also for creatively illuminating your subjects.
“Night photography opens up a whole new world for you. With the right equipment and a little patience, you can create breathtaking images that would be impossible in daylight.”
Creative Techniques for Impressive Long Exposures

Experimenting with Light Painting
Light painting is a fascinating technique where you draw with a light source in the dark while the camera takes a long exposure. Imagine writing your name in the air with a flashlight! The key is to choose the right exposure time to capture the light well. A few tips:
- Use a flashlight or LED lights.
- Set the camera on a tripod to avoid blurring.
- Try different light sources to achieve unique effects.
Multiple Exposures for Unique Effects
Multiple exposures allow you to layer several images on top of each other. This can look pretty cool. Imagine combining a picture of a city at night with a starry sky – magical! Some steps to get started:
- Choose a main subject that is clear and interesting.
- Combine it with a second image that offers a different perspective or light.
- Use camera functions or image editing software to overlay the images.
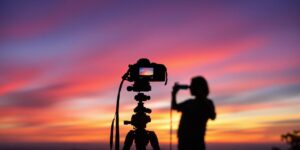
The Art of Silhouettes at Night
Silhouettes are particularly exciting when you capture them at night. They stand out against bright backgrounds and give your images depth and mood. Here are a few tricks to master silhouettes:
- Choose a bright background, such as the sky or illuminated buildings.
- Make sure the subject is clearly recognizable.
- Play with the exposure time to achieve the desired brightness.
With long exposure, you can see the world in a completely new way. Long exposure is an impressive technique to create breathtaking and almost surreal landscape photos. It challenges you to be creative and play with light and shadow. So grab your camera and let your imagination run wild!
Motif Ideas for Breathtaking Night Shots

Urban Landscapes and Their Lights
Night shots in cities are simply fascinating. The city lights shining against the dark sky offer an impressive backdrop. Whether you’re photographing the skyline or small alleys, the urban environment offers countless possibilities. Reflections in glass facades or on wet streets can add depth to your images. Remember to experiment with different perspectives to achieve the best results.
Showcasing Natural Elements
There is also much to discover in nature at night. A clear starry sky over a calm lake or the silhouette of trees in the moonlight can create magical images. You can also work with artificial light to highlight certain details. A flashlight can help create interesting effects by being directed at objects.
Photographing Architecture at Night
Buildings at night have their own charm. The lighting of historical buildings or modern skyscrapers can create dramatic contrasts. Pay attention to how the light casts shadows and emphasizes structures. Sometimes it can be exciting to illuminate only parts of a building and leave the rest in the dark to create a mysterious flair.
Night photography opens up the possibility for you to see the world from a different perspective. It is an invitation to play with light and shadow and unleash your creativity.
Challenges and Solutions in Night Photography
Dealing with Image Noise in Darkness
So, image noise can be really annoying, right? Especially at night when light is already scarce. But don’t worry, there are a few tricks to get it under control.
- Keep ISO low: Try to keep the ISO value as low as possible. Sure, you’ll need longer exposure times, but the noise will be much less.
- Extend exposure time: Use a tripod to allow longer exposure times without your images blurring.
- Post-processing: Software like Lightroom or Photoshop can work wonders to reduce noise afterward.
Patience is really the key here. Sometimes it takes a few tries until the image comes out the way you imagine it.
Capturing Movement in the Image
Capturing movement at night can be super exciting, but it’s also a challenge. Here are a few tips:
- Use long exposure to capture movements like car lights or flowing water as light trails.
- Play with the aperture: A larger aperture (e.g., f/2.8) lets in more light and can help keep moving subjects sharp.
- Use a remote shutter release or the self-timer to avoid blurring.
Mastering High-Contrast Scenes
Contrasts in night shots can be tricky. You don’t want the sky to be completely black and the lights to be overexposed.
- Exposure metering: Spot metering can help if you have a bright subject against a dark background.
- Adjust exposure compensation: Don’t always rely on automation. Sometimes it’s better to intervene manually.
- Try HDR technique: Combine multiple exposures to retain details in both the highlights and shadows.
Night photography is a real playground for creative minds! Just try different techniques and find out what works best for you.
Post-Processing: The Finishing Touch for Your Night Photos
Noise Reduction for Clearer Images
Night shots often struggle with image noise, especially at high ISO values. This is where noise reduction comes into play. Careful noise reduction can make the difference between an acceptable and an impressive image. It’s important to minimize noise without losing details. Experiment with the settings of your image editing software and find the perfect balance.
Color Correction and Light Adjustments
Night images are often discolored by artificial light sources. Color correction helps make these colors appear more natural. Adjust the white balance and play with the sliders for temperature and tint until you are satisfied. Light adjustments are also crucial to balance over- or underexposed areas. This way, you can preserve the magic of the night in your images.
Using Creative Filters and Effects
Filters and effects can give your night images a special touch. Whether you prefer a dramatic black-and-white look or a dreamy glow effect, the possibilities are almost endless. But be careful: less is often more. Choose filters that enhance the mood of your photo without overloading it.
Post-processing is not just a technical process but also a creative journey. It gives you the freedom to shape your nocturnal experiences in a way that reflects your personal perspective.
Inspiration and Tips from Experienced Night Photographers
Learn from the Best in the Industry
Whether you’re just starting out or already have some experience, there’s always something new to learn. Experienced night photographers often have valuable insights that can help you improve your skills. They know how to deal with the challenges of darkness and get the best out of every situation. See how they play with light and shadow and what techniques they prefer. You might discover new approaches that you want to try yourself.
Tips for Getting Started in Night Photography
If you’re new to night photography, it’s important to keep some basic tips in mind:
- Patience is key: Take your time to plan and execute your shots carefully. The best images often come when you take the time to compose the scene correctly.
- Experiment with exposure times: Longer exposure times can create amazing effects, such as light trails from cars or the gentle glow of the moon.
- Use manual focusing: In the dark, autofocus can have difficulties. Manual focusing gives you more control over the final result.
How to Develop Your Own Style
Developing your own photographic style is an exciting process. Start by trying out different techniques and subjects to find out what you enjoy the most. You might discover that you have a preference for urban nightscapes or that you enjoy experimenting with light painting. Let yourself be inspired by others, but don’t forget to go your own way and add your personal touch to every image.
Night photography is a journey where you constantly learn and evolve. Be open to experiments and use every opportunity to unleash your creativity.
If you want to learn more about how to capture challenging subjects through skillful composition and alignment, check out the tips from Marion Hogl. She offers numerous insights and tricks that can help you take your night photography to the next level.
Conclusion
Long exposure in night photography is like a little adventure. There is so much to discover and try out. Whether you’re capturing the city lights or the stars in the sky, the possibilities are endless. The important thing is that you have fun and don’t be afraid of mistakes. Every attempt takes you further and helps you find your own style. So grab your camera, go out into the night, and let your creativity run wild. Who knows, you might discover completely new facets of photography that you didn’t know before. Have fun experimenting!
Frequently Asked Questions
What is long exposure in photography?
Long exposure means that the camera lets light onto the sensor for a longer time. This creates images that depict movements like flowing water or passing clouds in a soft and flowing manner.
What equipment do I need for night photography?
For night photography, a camera with good low-light capabilities, a fast lens, and a stable tripod are important. A remote shutter release can also be helpful to avoid blurring.
How do I avoid image noise in night shots?
To avoid image noise, you should keep the ISO value as low as possible, ideally between 100 and 800. Good post-processing can also help reduce noise.
What are creative techniques in night photography?
You can experiment with light painting, multiple exposures, or the art of silhouettes. These techniques help create unique and interesting night shots.
How do I capture movement in night photography?
With long exposure, you can capture movements like light trails from cars. A shorter exposure time can freeze fast movements and depict details sharply.
What subjects are suitable for night shots?
Urban landscapes, natural elements, and architecture are popular subjects. Pay attention to interesting light sources and reflections to make your images more exciting.

