


Photography can be intimidating, especially when you’re just starting out or looking to expand your skills. But don’t worry! This article covers the basics of photography, useful for both beginners and advanced photographers. Whether you’re using a professional camera or your smartphone, you’ll find tips and tricks here to take your photos to the next level. Let’s explore the world of photography together and discover how to get the best out of your pictures.
Key Insights
- Composition is crucial: Use the rule of thirds to place your subject in an engaging way.
- Light is everything: Shoot during the golden hour for the best natural light.
- Understand your camera: Master aperture, ISO, and shutter speed for better control.
- Smartphones are versatile: Use special modes like portrait or night for better results.
- Post-processing is key: Use apps to get the most out of your photos.
The Art of Composition

Rule of Thirds: Balancing Your Image
When you take a picture, think about the rule of thirds. Imagine your image is divided into nine equal parts. Place the main subject along these lines or at their intersections. This creates a balanced and interesting image. It’s like magic how this simple technique draws attention to the essentials.
Perspective Shift: Discover New Angles
Sometimes, just changing the perspective can make a picture exciting. Try it from below or from a bird’s eye view. These unusual angles can give your photo a unique touch. Feel free to experiment and have fun!
Focus and Sharpness: Highlighting the Essentials
Focus is key in photography. Make sure what you want to show is really sharp. On your smartphone, just tap the screen to set the focus point. A tripod can help avoid blurring. This keeps your subject clear and in the spotlight.
Good composition is the key to enhancing the visual impact of your photos and directing attention purposefully. Use these techniques to take your photos to the next level!
Light and Shadow: The Magic of Exposure
The right exposure can make the difference between an ordinary and a stunning photo. It’s about balancing light and shadow to create the desired mood.
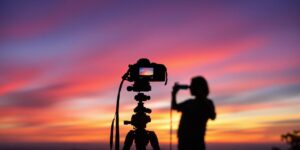
Golden Hour: Shooting in the Best Light
The Golden Hour is the holy grail for photographers. This time shortly after sunrise and before sunset offers soft, warm light, perfect for portraits and landscapes. The shadows are long and gentle, giving your image depth and dimension. Use this opportunity to experiment with different perspectives and capture the beauty of natural light.
Avoiding Harsh Shadows: Tips and Tricks
Harsh shadows can ruin a photo. They make faces look unflattering and details disappear. To avoid this, try photographing your subject in the shade or on cloudy days. When shooting outdoors, use reflectors or bright surfaces to diffuse the light. A simple trick is to use your camera’s flash as fill light to brighten shadows.
Artificial Lighting: When the Sun Doesn’t Shine
Sometimes natural light isn’t enough, especially indoors or for night shots. This is where artificial lighting comes into play. LED lights or softboxes can help illuminate your subject evenly. Be careful not to direct the light straight at the subject to avoid harsh shadows. Instead, you can bounce the light off a wall or ceiling for a softer, more natural result.
Balancing light and shadow is not only a technical challenge but also a creative opportunity to bring your images to life. Experiment with different light sources and directions to create the perfect mood.
For more details and photography tips, check out these photography tips to achieve the optimal balance between brightness and shadow.
Camera Techniques for Beginners and Advanced Users
Aperture, ISO, and Shutter Speed: The Basics
Photography is more than just pressing the shutter button. The three pillars are aperture, ISO, and shutter speed.
- Aperture: It controls how much light hits the sensor. A large aperture (small number) lets in a lot of light and creates a blurry background, perfect for portraits. A small aperture (large number) is suitable for landscapes where everything should be sharp.
- ISO: This value determines your camera’s sensitivity to light. In low light, you can increase the ISO, but be careful – too much ISO can lead to image noise.
- Shutter Speed: It determines how long light hits the sensor. A short shutter speed freezes motion, while a longer shutter speed creates motion blur, ideal for creative effects.
Manual Settings: More Control Over Your Images
Automatic modes are convenient, but manual settings give you control. You decide how the image should look.
- Get to know your camera: Read the manual or watch tutorials. Understand what the symbols mean.
- Practice, practice, practice: Go out and experiment with different settings. Play with aperture, ISO, and shutter speed.
- Be patient: The best photos don’t always come on the first try. It takes time to get a feel for the camera.
“The freedom of manual mode opens up a world of creative possibilities for you.”
Camera Apps: Automatic vs. Manual
Nowadays, many camera apps offer both automatic and manual modes. Which one is right for you?
- Automatic Mode: Ideal for quick snapshots. The app chooses the best settings for you.
- Manual Mode: For those who want more control. Here you can set everything from aperture to shutter speed yourself.
- Hybrid Apps: Some apps offer a mix of both, allowing you to quickly switch between modes.
With the right technique and a little practice, you can take your photography to the next level. Whether you’re a beginner or advanced, technique is the heart of every good shot.
Smartphone Photography: Always Ready for the Perfect Shot

Portrait Mode and Bokeh: The Blurry Background
Your smartphone’s portrait mode is a real game-changer. It creates a blurry background, known as bokeh, that highlights your subject. This gives your photos a professional touch. For the best effect, make sure your subject is well-lit and clearly stands out from the background. Experiment with different distances and perspectives to achieve the perfect shot.
Night Mode: Shooting in Low Light
Shooting in low light can be tricky, but your smartphone’s night mode helps you out. This mode extends the exposure time to capture more light without needing a tripod. However, keep the phone as steady as possible to avoid blurring. Try it with city lights or a starry sky – the results can be stunning.
Panorama: Capturing Wide Landscapes
With the panorama function, you can capture impressive landscapes in their full width. This feature is ideal for travel or hikes where you want to capture the entire beauty of the surroundings. Make sure to move your smartphone slowly and steadily to get a seamless image.
Smartphone photography is more than just a snapshot. With a little practice and creativity, you can create truly impressive images that tell stories. Get inspired and try new techniques. And don’t forget, this guide offers you more creative techniques to improve your photography and film production.
Take advantage of the possibilities your smartphone offers and discover the world from new perspectives. Whether you’re a beginner or already advanced – with these tips, you’re always ready for the perfect shot!
Post-Processing: The Final Touch for Your Photos
Editing Apps: Your Digital Tools
Nowadays, there are a variety of apps that can help you get the most out of your photos. Whether you’re a fan of Adobe Lightroom, Snapseed, or VSCO, these tools offer countless ways to optimize your images. Adjust colors, increase contrasts, or simply remove small blemishes – with the right app, it’s all possible. Some apps even offer special filters that can give your image a whole new mood.
Filters and Effects: Creativity Without Limits
Filters aren’t just for Instagram! They can give your photos a whole new look. Whether you prefer a vintage effect or vibrant colors, there’s a filter for every mood. But be careful: less is often more. Don’t overdo it with effects, or the natural charm of your image may be lost. Sometimes a small slider is all it takes to make the photo perfect.
RAW Files: More Control Over the Final Result
If you really want to go in-depth, you should deal with RAW files. These files store much more image information than the usual JPEG format, giving you more leeway in post-processing. You can adjust exposure, white balance, and other details afterward without losing quality. Sure, dealing with RAW is a bit more complex, but the results can be impressive.
“Post-processing is like the salt in the soup – it can turn a good photo into a great one.”
If you want to learn more about the basics of photography, check out Learning Photography is Easier Than You Think. There you’ll find many useful tips for beginners and advanced photographers.
The Right Equipment: What You Really Need
Camera Body or Lens: What to Buy First?
If you’re just getting into photography, you might wonder whether to invest in a good camera body or a high-quality lens first. The answer is simple: A good lens can make a bigger difference in image quality than an expensive body. A cheap body with a great lens often delivers better results than the other way around. Consider what type of photography interests you and choose a lens that suits it, whether it’s a wide-angle for landscapes or a telephoto lens for wildlife photography.
Tripods and Gimbals: For Stable Shots
A tripod is an essential tool when shooting in low light or with long exposure times. It keeps your camera stable and prevents blurring. Gimbals are especially useful for video recordings as they balance movements and ensure smooth, professional clips. Here are a few things to consider when buying a tripod:
- Weight: Lightweight tripods are easier to transport.
- Stability: It should stand stable even in the wind.
- Height: An adjustable tripod is more versatile.
Additional Lenses: More Options for Your Smartphone
Smartphones today are equipped with surprisingly good cameras, but sometimes the built-in lens isn’t enough. Additional lenses can help here. They can be easily attached and significantly expand the capabilities of your smartphone camera. Whether fisheye, macro, or telephoto – there are many options to get creative. Remember to keep the lenses clean to ensure the best image quality.
“Invest in the right equipment, but remember: The best camera is the one you have with you.” – This saying reminds us that equipment is important, but creativity and practice are just as crucial.
Creative Photo Projects: Expanding Your Skills
Long Exposure: Capturing Movement in the Image
Long exposure can give your photos a magical touch. You can capture movements that would otherwise remain invisible, like flowing water or passing clouds. Imagine turning the lights of cars at night into glowing lines. All you need is a tripod and a little patience. Set the camera to a long shutter speed and keep the subject as still as possible.
Macro Photography: Discovering the World in Detail
With macro photography, you can dive into a world often hidden from the naked eye. You discover details you would never have noticed otherwise. Simply fascinating how a simple dewdrop on a leaf becomes a small work of art. All you need is a macro lens or a smartphone with the appropriate lens. Get close to your subject and experiment with different angles and lighting conditions.
Street Photography: Telling Stories on the Street
Street photography is like a little adventure in the city. You capture moments that reflect everyday life. The challenge is to press the shutter at the right moment to tell a story. Look for interesting faces, unusual scenes, or exciting light and shadow effects. With a little practice, you’ll quickly realize that the best photos often happen spontaneously.
“Photography is not just capturing images, but telling stories.”
If you want to learn more about creative photo projects, check out these creative photo tips and image ideas that show you how to achieve impressive results with simple means.
Conclusion
Photography is a wonderful journey that never really ends. Whether you’re just starting out or already an experienced photographer, there’s always something new to discover. The basics are important, but experimenting and having fun make the difference. So grab your camera, go out, and capture the world as you see it. And remember, there are no perfect photos, only perfect moments. Have fun photographing!
Frequently Asked Questions
What is the rule of thirds in photography?
The rule of thirds divides an image into nine equal parts. The main subject is placed on the lines or intersections to make the image balanced and interesting.
When is the best time to take photos?
The golden hour, shortly after sunrise and before sunset, offers soft and warm light ideal for impressive photos.
How do I avoid harsh shadows in my photos?
Avoid direct sunlight and instead use soft, diffuse light. Artificial light sources like lamps can also help reduce shadows.
What settings should I use in low light?
In low light, you can increase the ISO, open the aperture, and extend the exposure time. A tripod helps avoid blurring.
Why are manual camera settings important?
Manual settings give you more control over your photos, allowing you to precisely adjust exposure, sharpness, and other factors.
Which apps are suitable for photo editing?
Apps like Adobe Lightroom, Snapseed, and VSCO offer many tools to enhance your photos and add creative effects.

